

Table of Contents
- Why Rubber Coated Dumbbells Need Special Care
- What You Need: Safe Cleaning Products for Home Gym Equipment
- Step-by-Step: How to Clean Rubber Coated Dumbbells
- How to Remove White Oxidation from Rubber Dumbbells
- Repairing Damaged Rubber Coating and Restoring Grip
- Your Rubber Dumbbell Maintenance Schedule
- Conclusion: Keep Your Equipment in Peak Condition
- Frequently Asked Questions
Last Updated: September 6, 2026
Why Rubber Coated Dumbbells Need Special Care
Rubber coated dumbbells are a smart investment for any home gym, offering floor protection and a quieter workout than bare iron. Yet the rubber coating is also a porous surface that absorbs sweat, dust, and oils from your hands, which can lead to surface degradation, a sticky residue buildup, and unpleasant odors over time. Learning how to clean and maintain rubber coated dumbbells correctly is the difference between equipment that lasts a decade and gear that looks neglected after a few months.

Customers sometimes wonder why their premium strength training tools develop white blotches or a chalky film. The short answer: that coating needs regular attention. Most people assume a quick wipe with any household cleaner is enough, but many common products actually accelerate the breakdown of the rubber. Below, we'll show you exactly what to use, what to avoid, and how to build a simple routine that keeps your rubber coated dumbbells looking and performing like new. The process takes minutes once you know the rules, and it protects the grip texture and surface finish that make these weights a pleasure to train with.
What You Need: Safe Cleaning Products for Home Gym Equipment
The right cleaning products depend on the specific rubber compound on your dumbbells. Most home gym owners assume all rubber coatings are the same, but virgin rubber, recycled rubber, and urethane coatings each respond differently to cleaners.
Virgin rubber, the smooth, dense coating found on premium dumbbells, is the most forgiving. A pH-neutral soap diluted in warm water is sufficient for routine cleaning (the American Dental Association). Recycled rubber, often used in budget-friendly hex dumbbells, is more porous and tends to absorb oils faster. It requires a slightly stronger dilution of soap and more aggressive drying to prevent odor. Urethane coatings, which are technically not rubber but a polymer blend, are the most chemically resistant and can tolerate a wider range of cleaners, though you should still avoid solvents.
Choosing Cleaners That Protect Indoor Air Quality
A unique angle most cleaning guides miss is the environmental and health impact of your cleaning agents. Home gyms are often in basements, garages, or spare bedrooms with limited ventilation. Harsh chemical fumes from ammonia or bleach-based products don't just damage the rubber, they linger in the air you breathe during your next workout.
For an eco-friendly and non-toxic approach, a simple solution of castile soap (such as Dr. Bronner's) mixed with water is highly effective. Castile soap is plant-based, biodegradable, and free of synthetic fragrances that can irritate sensitive lungs. Another option is a white vinegar and water solution at a 1:3 ratio, which naturally cuts through grime and neutralizes odors without leaving toxic residue. Vinegar is mildly acidic, so it's safe for rubber but should be rinsed off thoroughly to avoid any lingering smell.
Cleaning Agents to Avoid
Some popular cleaners are surprisingly destructive to rubber. Ammonia, bleach, and phenol-based products are the main culprits, as they break down the rubber's molecular structure and cause it to become brittle or sticky (the CDC). Solvent-based degreasers and alcohol wipes can also strip the protective coating and dull the surface finish.
Beyond the obvious harsh chemicals, avoid any cleaner with petroleum distillates or silicone oils in high concentrations. While silicone can help restore grip temporarily, heavy silicone buildup actually attracts dust and creates a slick film over time. If you use a silicone-based conditioner, apply it sparingly and wipe off any excess after it cures.
Step-by-Step: How to Clean Rubber Coated Dumbbells
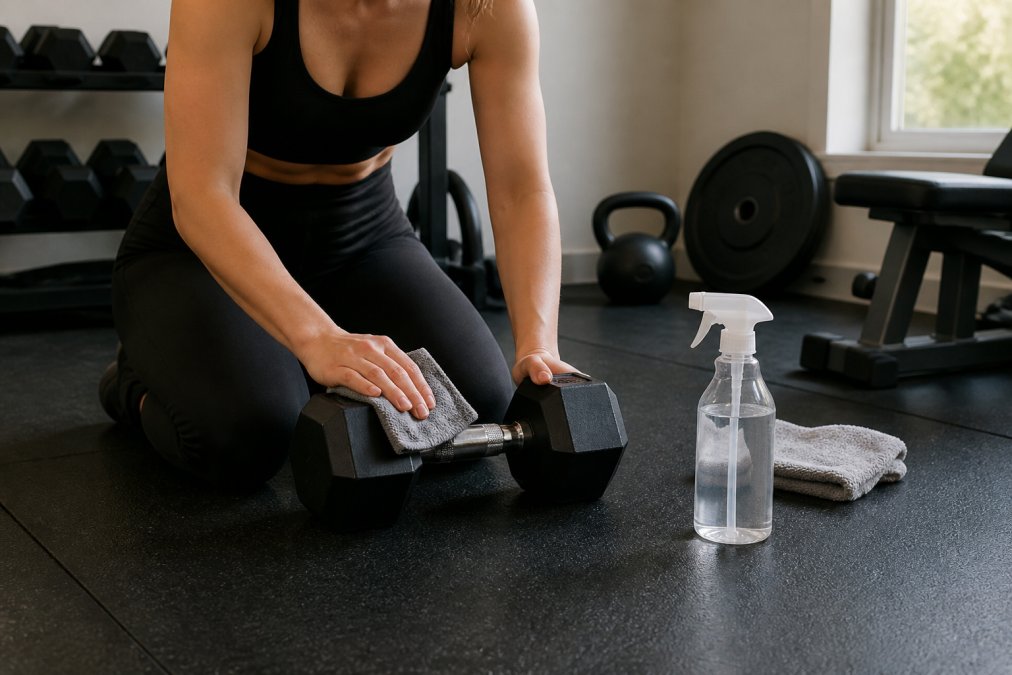
Cleaning rubber coated dumbbells is a straightforward process that takes about five minutes per pair when done regularly. Start by gathering your supplies: a bucket of warm water, a few drops of mild dish soap, and two microfiber cloths. One cloth is for washing, and the other is for drying, since leaving moisture on the rubber invites bacteria and mildew.
- Mix a small amount of mild soap into warm water until it's sudsy.
- Dip your microfiber cloth into the solution and wring it out well. You want a damp towel, not a dripping one.
- Wipe down the entire surface of each dumbbell, paying extra attention to the handle and the flat ends where sweat collects.
- For stubborn grime, let the soapy cloth sit on the area for a minute before scrubbing gently.
- Rinse the cloth in clean water and wipe each dumbbell again to remove any soap residue.
- Dry each piece thoroughly with your second microfiber cloth.
Daily Wipe Down vs. Deep Cleaning
Your cleaning frequency should match your training volume. A daily wipe down after each workout, using just a damp towel to remove fresh sweat, is the single best preventative maintenance habit you can build. This takes under a minute and prevents residue from ever hardening onto the surface.
A deep clean, following the full step-by-step process above, should happen every two to four weeks depending on how often you train. This is when you address any buildup in the grip texture and apply a rubber conditioner to keep the coating supple. Skipping the daily wipe down means you'll need deeper cleaning more often, so the daily habit is worth the small effort.
How to Remove White Oxidation from Rubber Dumbbells
White oxidation on rubber dumbbells is a common issue that appears as a chalky, light-colored film on the surface (nist.gov). This is not mold, and it's not a sign the dumbbells are ruined. It's a natural result of the rubber's curing process and exposure to air, and it's entirely removable with the right approach.
To remove white oxidation from rubber dumbbells, create a paste using baking soda and water, then gently rub it into the affected areas with a soft cloth. The mild abrasiveness lifts the oxidation without damaging the rubber beneath. After treating the spots, rinse with a clean damp towel and dry thoroughly. Applying a silicone lubricant or rubber conditioner afterward helps prevent the oxidation from returning by sealing the surface.
Repairing Damaged Rubber Coating and Restoring Grip
Not all damage requires replacing your dumbbells, but the repair approach depends on the severity and location of the damage. This section goes deeper than typical guides to give you a practical troubleshooting framework.
Patching Small Tears and Cracks
For minor nicks, cuts, or surface cracks that haven't exposed the metal core, a rubber-safe adhesive like E6000 or a silicone-based sealant (such as GE Silicone II) works well. Clean the area thoroughly with your soap solution and let it dry completely. Apply a thin layer of the adhesive directly into the crack, then press the edges together and hold for 30 seconds. Wipe away any excess with a damp cloth before it cures. Allow 24 hours for full curing before using the dumbbell.
For deeper gouges where the cast iron core is exposed, you need a two-part rubber repair compound, products like Permatex's Black Rubber Repair or Loctite's Marine Epoxy are commonly used in home gym settings. These create a durable patch that flexes with the rubber rather than cracking under load. Mix the compound according to the package directions, fill the gouge slightly above the surrounding surface, then sand it flat with fine-grit sandpaper (220-grit) once cured.
Restoring Grip Without Making Dumbbells Slippery
The slickness versus grip trade-off is a real concern. Over time, sweat and body oils create a thin film that makes the handle feel smooth, even with the original grip texture. A thorough cleaning with warm soapy water removes this film and restores most of the original tackiness, this should always be your first step.
If the surface still feels slick after cleaning, the rubber may have become polished from repeated friction. Here, a rubber conditioner like 303 Aerospace Protectant or Armor All Original can help. Apply a small amount to a cloth, rub it into the handle, and let it sit for 5 minutes. Then wipe off all excess with a dry cloth. The key is to leave a microscopic layer that conditions the rubber without creating a slippery surface. If you apply too much, the handle will feel greasy, this is the most common mistake.
For a non-chemical approach, chalk (the same magnesium carbonate chalk used for weightlifting) restores grip without any conditioning benefit. It absorbs moisture and adds friction instantly. However, chalk builds up in the grip texture over time, so you'll need to clean it off more frequently.
When to Stop Repairing and Replace
A common pattern is that owners try to patch damage that's too extensive. If the rubber coating is cracking across more than 25% of the dumbbell surface, or if chunks are falling off during normal use, the coating has reached the end of its lifespan. At this point, continued repair is a losing battle. The rubber has lost its plasticizers and become brittle, and no adhesive will restore its structural integrity. Replacing the dumbbell is the safer and more cost-effective option.
Your Rubber Dumbbell Maintenance Schedule
A consistent maintenance schedule keeps your equipment in peak condition with minimal effort. The table below summarizes what to do and how often, so you can protect your rubber coated dumbbells without overthinking the process.
| Task | Frequency | Time Needed | Primary Benefit |
|---|---|---|---|
| Wipe down with damp cloth | After every workout | Under 1 minute | Prevents sweat residue buildup |
| Deep clean with mild soap | Every 2-4 weeks | 5 minutes per pair | Removes embedded grime and bacteria |
| Treat white oxidation | As needed | 5-10 minutes | Restores original dark finish |
| Apply rubber conditioner | Monthly | 2 minutes | Prevents cracking and drying |
| Inspect for damage | Monthly | 1 minute | Catches cuts before they worsen |
Storage also plays a role in rubber longevity. Keep your dumbbells off concrete floors, which can leach moisture and cause spotting, and store them in a dry area away from direct sunlight. UV exposure accelerates oxidation and fades the rubber, so a rack in a climate-controlled room is ideal. If you're using a dumbbell set that includes multiple pairs, the hexagon design prevents rolling, making organized storage simpler.
Conclusion: Keep Your Equipment in Peak Condition
Rubber coated dumbbells reward consistent care with years of reliable service, and the routine is simple enough to fit into any schedule. The daily wipe down takes seconds, the monthly deep clean takes minutes, and avoiding harsh chemicals protects the rubber from premature aging. Whether you're maintaining your first pair of 5LB dumbbells or a full rack, these habits keep your equipment hygienic, attractive, and ready for every workout.
At Bodyhackfitness, we believe your training environment should support your progress, and that includes gear that feels good in your hands. Browse our selection of rubber coated dumbbells and recovery equipment to build a home gym setup you'll be proud to use, and pair it with our digital fitness programs to stay consistent.
Frequently Asked Questions
Can you use disinfectant wipes on rubber dumbbells?
Yes, but you need to choose the right kind. Avoid wipes containing bleach, ammonia, or phenol, as these can degrade the rubber coating over time and cause surface degradation. Look for pH-neutral, alcohol-free disinfectant wipes or make your own with mild soap and water. After wiping, follow up with a damp towel to remove any residue, then dry the dumbbells completely to prevent moisture-related issues.
Should I use oil or silicone spray on rubber dumbbells?
Use a small amount of silicone lubricant or a dedicated rubber conditioner, not oil. Petroleum-based oils can break down the rubber compound and leave a sticky residue that attracts dust and dirt. Silicone spray helps restore the surface finish and prevents oxidation without damaging the material. Apply sparingly to a microfiber cloth and wipe the rubber heads, then let them air dry completely before storing.
How often should I clean my home gym equipment?
You should wipe down your rubber coated dumbbells after every workout as part of a preventative maintenance routine. Sweat and bacteria buildup can cause odors and surface damage if left to sit. A deeper cleaning to remove white oxidation and condition the rubber should happen once a month, depending on how frequently you train. Consistent cleaning protects the rubber longevity and keeps your equipment looking new.
How do you get the white film off rubber dumbbells?
That white film is oxidation, a natural result of the rubber curing process and exposure to air. To remove it, wash the dumbbells with a solution of mild soap and warm water, scrubbing gently with a soft brush or microfiber cloth. For stubborn spots, a paste of baking soda and water works well. Rinse thoroughly and dry completely. Follow up with a rubber conditioner to protect the surface and prevent the film from returning.
Maintaining your rubber coated dumbbells comes down to consistent care and the right products. When you're ready to add to your collection or start fresh, Bodyhackfitness offers premium dumbbells with durable rubber coatings and ergonomic chrome handles, plus the digital programs to keep you motivated. Shop now and train with equipment that's built to last.