

Table of Contents
- Why Your Hip Flexors Stay Tight (And Why Stretching Alone Won't Fix It)
- 7 Yoga Poses for Tight Hip Flexors
- How Long to Hold Hip Flexor Stretches for Real Results
- Hip Flexor Stretches for Runners: Recovery That Matches Your Mileage
- The Best Recovery Tools for Tight Hips
- Prop Modifications and Safety: When to Back Off
- Build a Routine You'll Actually Keep
- Frequently Asked Questions
Last Updated: September 16, 2026
Why Your Hip Flexors Stay Tight (And Why Stretching Alone Won't Fix It)
Your hip flexors stay tight because they hold a shortened position for hours, and passive stretching doesn't undo that. The psoas and iliacus connect your lumbar spine to your femur; sit for six hours and those tissues adapt to the shorter length.
Most guides get it wrong: they treat tight hip flexors as a flexibility problem when it's usually a strength and positioning problem.
7 Yoga Poses for Tight Hip Flexors
These seven poses for tight hip flexors cover extension, external rotation, abduction, and gentle traction. Hold each for the time noted, breathe slowly, and stop short of sharp pain.
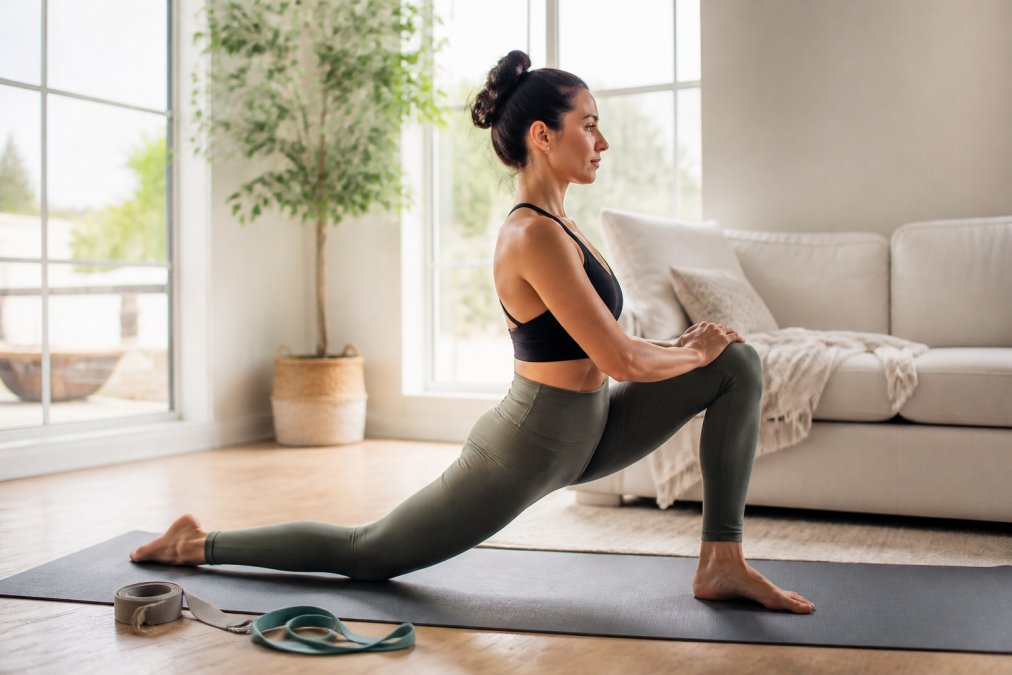
1. Anjaneyasana (Low Lunge)
Kneel, step your right foot forward, and lower your left knee. Tuck your pelvis under, then reach both arms overhead, that pelvic tilt is the whole point. Without it, you're just hanging in your lower back.
2. Malasana (Garland Pose)
Squat with feet slightly wider than your hips, heels down if they'll stay there, palms together at your chest. Use your elbows to gently press your knees outward.
3. Setu Bandha Sarvangasana (Bridge Pose)
Lie on your back, knees bent, feet hip-width apart. Press through your feet and lift your hips. Squeeze your glutes at the top.
4. Baddha Konasana (Bound Angle Pose)
Sit tall with soles together and knees falling out to the sides; sit on a folded blanket if your lower back rounds.
5. Ustrasana (Camel Pose)
Kneel upright, hands on your lower back, and lean back. Only reach for your heels if your hip flexors allow it without pinching.
6. Natarajasana (Dancer Pose)
Stand on your left leg, bend your right knee, and hold your ankle behind you with a strap. Kick your foot into the strap while lifting your chest.
7. Dhanurasana (Bow Pose)
Lie face down, bend both knees, and reach back for your ankles. Lift your chest and thighs off the floor.
| Pose | Hold Time | Best For | Prop Option |
|---|---|---|---|
| Anjaneyasana | 60-90 sec | Front hip extension | Blanket under knee |
| Malasana | 45-60 sec | Hip opening, ankles | Block under heels |
| Setu Bandha Sarvangasana | 30 sec x3 | Glute activation | Block between knees |
| Baddha Konasana | 1-2 min | Inner hip, connective tissue | Blanket under hips |
| Ustrasana | 20-30 sec | Front hip, chest | Strap for heels |
| Natarajasana | 20-30 sec | Balance, front hip | Strap for ankle |
| Dhanurasana | 15-20 sec | Deep front hip release | Strap for ankles |
How Long to Hold Hip Flexor Stretches for Real Results
Hold hip flexor stretches for 60 to 90 seconds per side for lasting change, not the 15 to 30 seconds most classes teach. Longer holds produce greater range-of-motion gains, especially in tissues adapted to a shortened position over years.
Static vs. dynamic: they do different jobs
Most guides tell you to hold stretches longer and stop there. The other half is knowing which kind of movement to do when, static and dynamic work trigger different physiological responses.
A weekly structure that actually fits real life
- Warm up for 5 minutes with dynamic movement, leg swings, walking lunges, hip circles
- Hold each static stretch 60-90 seconds per side
- Breathe slowly through the hold; tension should ease, not build
- Repeat the full sequence 3-4 times per week
- On busy days, do three poses, low lunge, bridge, and bound angle cover the front, glute, and inner hip
Post-run vs. post-lift: same poses, different emphasis
After a run, the hip flexors have worked in a shortened range the whole session. Prioritize front-of-hip extension, low lunge and a standing quad stretch, held long with slow nasal breathing, plus bridge pose to wake up dormant glutes.
1pc Multifunctional Adjustable Yoga →
Hip Flexor Stretches for Runners: Recovery That Matches Your Mileage
Runners need hip flexor work after runs, not before. Pre-run static stretching temporarily reduces power output, while post-run stretching supports recovery while tissues are warm.
For runners specifically, prioritize:
- Low lunge after every run, 90 seconds per side
- Bridge pose to reinforce glute activation and reduce anterior pelvic tilt
- Dancer pose for balance and single-leg stability
The Best Recovery Tools for Tight Hips
The best recovery tools for tight hips are ones you'll actually use consistently: a strap for assisted stretching, a resistance band for glute activation, and a mat you don't mind leaving out.
Prop Modifications and Safety: When to Back Off
Prop-based modifications aren't a beginner's crutch, they keep the stretch in the target tissue instead of dumping load into your lumbar spine or knee. The difference between a productive hip flexor stretch and a wasted one is usually two inches of height under a knee or a strap looped one rung shorter.
How to actually use each prop
Blocks (typically 3-4 inches tall, foam or cork). A block under the knee in low lunge removes kneecap compression and lets you tilt the pelvis without the back leg sliding; stack a second block if your front hip still won't extend. In Camel, a block under each hand shortens the reach so the bend travels through the hip and thoracic spine, not the lumbar vertebrae.
When to back off entirely
Prop modifications handle tightness. They do not handle pathology. Stop the stretch and get evaluated by a physician or physical therapist if any of the following apply:
- A sharp pinch at the front of the hip during extension (low lunge, Camel, Bow). This is the classic presentation of hip impingement, where the femoral head or labrum gets pinched against the acetabular rim. Stretching into it makes it worse, not better.
- A diagnosed labral tear. Deep hip flexion and end-range rotation can irritate the torn tissue. Work with a PT on a specific protocol rather than a general yoga sequence.
- Recent hip surgery or hip replacement. Respect the surgeon's range-of-motion restrictions, they exist for a reason, and pushing past them can dislocate the joint.
- Pain that lingers after you leave the pose. A stretch should ease within a minute of coming out. If the ache persists for hours or shows up the next morning, you went too far.
- A deep, catching click with pain in the front of the hip during flexion. Snapping hip syndrome is usually benign when painless, but painful catching warrants a look.
- Numbness, tingling, or shooting pain down the leg. That's nerve involvement, not muscle tightness, and stretching is the wrong tool.
The rule of thumb
Use props to change the angle of the stretch, not to force a range you don't have. If a block, strap, or blanket lets you hold a pose 60 seconds with slow breathing and no pinching, you're doing it right. If you're gritting your teeth, the pose is too advanced for today.
Build a Routine You'll Actually Keep
The hardest part of hip mobility work isn't the poses. It's doing them four times a week when your hips don't hurt yet.
Frequently Asked Questions
How often should you stretch your hip flexors for best results?
Aim for daily or near-daily practice, even if sessions are short. Holding each yoga pose for tight hip flexors for 30 to 60 seconds, two to three rounds per side, gives connective tissue enough time to respond. Consistency matters more than duration: five minutes daily beats one long session per week. Pair static holds with dynamic movement like leg swings before activity, and use a resistance band or yoga strap to extend your range without forcing it.
What is the root cause of tight hip flexors?
Sitting is the most common driver. When you spend hours in a chair, the psoas muscle and rectus femoris stay in a shortened position, which can contribute to anterior pelvic tilt and altered posture. Running and cycling add repetitive hip flexion without equal extension. The result is muscle tension and reduced range of motion that stretching alone may not resolve. Adding glute activation work and postural awareness alongside your yoga practice addresses the pattern, not just the symptom.
Can yoga poses for tight hip flexors help runners recover faster?
Yes. Running shortens the hip flexors with every stride, so a targeted recovery routine after runs helps restore length and reduce next-day stiffness. Poses like Anjaneyasana, Malasana, and Setu Bandha Sarvangasana open the front of the hip while engaging the glutes. Hold each pose for 45 to 60 seconds after a run, once your muscles are warm. Pair this with a resistance band for gentle traction and you have a routine that fits into 10 minutes.
What are the best recovery tools for tight hips?
A yoga strap helps you extend reach in poses like Natarajasana without straining. A resistance band adds controlled tension for hip and thigh training. A tension band works well for glute activation, which balances the tightness in front. Keep sessions short and consistent. If a pose causes sharp pain or pinching in the front of the hip, back off and try a prop-based modification before pushing further.