


Last Updated: November 5, 2026
Quick Summary
A percussion massage can ease post-workout muscle stiffness when used briefly and gently. Keep the device on low to medium speed, glide slowly along the muscle, and spend about 30 to 60 seconds on each muscle group. Research suggests possible short-term benefits, but results are not guaranteed.
- Use the lowest speed on sensitive areas like the neck and shoulders.
- Limit each muscle group to about two to three minutes, per University of Utah Health guidance.
- Let the device's weight do the work; do not press hard into the muscle.
- Glide at roughly one inch per second, following the direction of the muscle fibers.
- Stop immediately if you feel sharp pain, numbness, or tingling.
Table of Contents
- What Percussion Massage Therapy Does for Sore Muscles
- What the Research Shows About Percussion Therapy and Recovery
- How to Use a Percussion Massager After Exercise
- Massage Gun Techniques for Sore Muscles
- A Step-by-Step Post-Workout Recovery Routine
- Massage Gun Safety and Precautions
- Building Your Recovery Routine: Your Next Steps
- Frequently Asked Questions
What Percussion Massage Therapy Does for Sore Muscles
Percussion massage uses rapid, short bursts of pressure to work into tired muscle tissue. A percussion massager, often called a massage gun, delivers these pulses through a handheld device with interchangeable heads. Many people reach for one after a hard session because it feels quick and easy to use.
The appeal is simple. You can treat sore calves, quads, or shoulders in a few minutes at home, without booking a therapist. But the device is not magic. Its job is to help you relax tight areas and ease the feeling of stiffness after exercise.
Here is what a percussion massager is generally used for:
- Easing post-workout muscle stiffness
- Loosening tight areas before a warm-up
- Relaxing sore spots between training days
- Adding a short, targeted massage to your recovery routine
Think of it as one tool in your recovery kit, not a replacement for sleep, food, or rest days.
What the Research Shows About Percussion Therapy and Recovery
Research on massage guns is growing, but the results are more modest than marketing often suggests. A 2023 review of massage gun effects on performance and recovery found that these devices may improve short-term range of motion and flexibility. The review did not establish a universal recovery percentage, so the benefits are best described as possible, not guaranteed.
A 2025 study published in Frontiers in Public Health looked at recovery from muscle soreness. It reported that two 40-minute sessions provided greater benefits than two 25-minute sessions. That study duration should not be treated as a general home recommendation, since the research setting differs from everyday use.
Another 2025 study compared percussive massage with static stretching. It found that percussive treatment helped ease muscle tone and stiffness right after exercise fatigue. The summary did not include a numerical effect size, so treat these findings as encouraging rather than conclusive.
Keep in mind that evidence is not uniformly positive. Some work suggests that outcomes depend on the activity and the measure used. The best approach is to test the device on your own body and track how you feel over several weeks.
How to Use a Percussion Massager After Exercise
Using a percussion massager after a workout takes less than ten minutes. The steps are simple, but small mistakes can reduce comfort.
Here is the basic process:
- Start on low speed to see how your muscles respond.
- Move slowly across the muscle, pausing briefly on tight spots.
- Spend about 30 to 60 seconds on each muscle group.
- Let the device do the work. Do not press hard into the muscle.
- Stop if you feel sharp pain, numbness, or tingling.
The University of Utah Health guidance on massage gun safety advises limiting use to two to three minutes on any one muscle group or area. That short window is a good default, especially after hard training.
Massage Gun Techniques for Sore Muscles
!A fit adult in athletic clothing using a handheld percussion massager on the calf while seated on a gym floor mat with a water bottle nearby
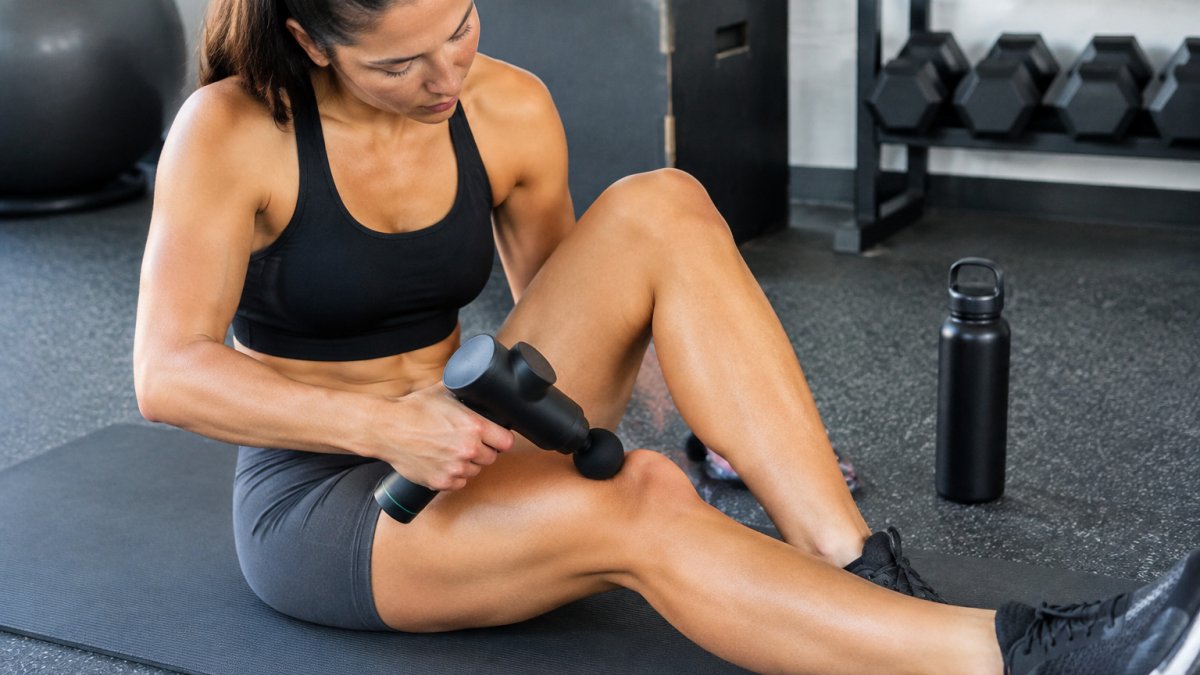
Technique matters more than speed. Most people get better results by moving slowly, keeping the head flat against the skin, and letting the device's own stroke do the work. A useful rule: if the muscle is visibly bouncing or the skin is reddening quickly, you are pressing too hard or running too fast.
Match speed to the job. Most devices offer several speed settings. Use the lowest setting for sensitive areas, the neck and shoulders, and any spot that feels bruised. Use a medium setting for large muscle bellies like the quads, glutes, and calves. Reserve the highest settings for thick, large muscle groups and only after you have tested lower speeds on that area.
Control pressure with the device's weight. Rest the head on the skin and let the massager's own weight supply contact. Do not lean your body weight into it. A common pattern is that people press harder when they feel a knot, which can bruise tissue and leave the area sorer the next day than before the session.
Move slowly and deliberately. Aim for roughly one inch per second along the muscle. Fast scrubbing tends to skip over tight areas and irritate the skin. Slow passes give the tissue time to respond.
Try these common approaches:
- Glide: Move the head slowly along the length of a muscle, from one end to the other, following the direction of the muscle fibers.
- Targeted pause: Hold the head on a knot or tight spot for 5 to 10 seconds at low speed, then move on. Do not stay on one spot for minutes.
- Muscle-by-muscle: Work one area at a time, such as the calf, then the hamstring, then the quad, so you can track how each area responds.
Avoid rolling the device over bones, joints, or the spine. Keep it on the fleshy parts of the muscle. The neck, the front of the throat, the armpit, the groin, and the area behind the knee are all places to skip or treat only with light, brief contact.
Choosing the Right Attachment Head
Most percussion massagers come with several heads. Each one suits a different job:
NNEDSZ Green Massage Gun - 6-Speed Deep Tissue Massager with 4 Professional →
- Flat or round heads: Best for large muscles like the quads, glutes, and back. Start here; it covers the most area and feels the most forgiving.
- Bullet or conical heads: Good for smaller, tighter spots, but use them gently and at low speed. They concentrate force, so they bruise more easily.
- Fork heads: Often used along the sides of the spine, not on the spine itself. Keep the tines on either side of the bony column.
- Air-cushion or soft heads: Useful for bony areas and for people who find the standard heads too intense.
If your device includes multiple heads, start with the flat one and only switch to a smaller head when you need more focus on a specific knot. A common mistake is reaching for the bullet head first because it feels more targeted; it is also the head most likely to cause soreness if used too long or too hard.
Watch out: Stop if you feel sharp pain, numbness, tingling, or a sensation that runs down a limb. Those are signs to back off, not to push through.
A Step-by-Step Post-Workout Recovery Routine
A repeatable routine beats an occasional deep session. The sequence below is built around recovery stages: cool down, rehydrate, treat the largest muscles first, then target smaller problem areas, and finish with gentle movement.
Stage 1, Cool down (5 minutes). Walk, pedal easily, or do light bodyweight movement until your breathing settles. Percussion on a still-elevated heart rate and hot, swollen tissue is less comfortable and less useful.
Stage 2, Hydrate and assess (1 minute). Drink water and scan your body. Note which areas feel tight versus which feel sore to the touch. Skip any area that is bruised, swollen, or painful at rest.
Stage 3, Large muscle groups (6 minutes total). Use the flat or round head on low-to-medium speed. Work each large group for about 90 seconds:
- Quads: glide from just above the knee toward the hip, staying on the meaty front and outer thigh.
- Hamstrings: glide from behind the knee toward the glute, avoiding the back of the knee joint.
- Glutes: slow passes across the center and outer hip, never on the bony point of the hip.
- Calves: glide from above the ankle toward the back of the knee, avoiding the Achilles tendon and the knee crease.
Stage 4, Targeted spots (3 minutes total). Switch to a bullet or conical head only if you need focus. Hold on a tight spot for 5 to 10 seconds at low speed, then move on. Do not dig in; the head should rest on the skin, not press into it.
Stage 5, Gentle movement (5 minutes). Finish with easy stretching or range-of-motion work for the muscles you just treated. Percussion may temporarily improve how a muscle feels and moves, so use that window for controlled movement rather than aggressive stretching.
Watch out: More time is not automatically better. A 2025 study in Frontiers in Public Health reported that two 40-minute sessions outperformed two 25-minute sessions in a research setting, but that protocol does not translate to daily home use.
If you want a compact option for the gym bag, the NNEOBA Mini Charging Fascia Gun is a anchor words that fits well into this routine.

The routine below breaks the session into stages, with the approximate time for each part.
| Stage | What to do | Time |
|---|---|---|
| Cool down | Walk, pedal easily, or move lightly until breathing settles | 5 minutes |
| Hydrate and assess | Drink water and note which areas are tight versus sore | 1 minute |
| Large muscle groups | Flat or round head on low to medium speed, one group at a time | 6 minutes total |
| Targeted spots | Bullet or conical head, hold tight spots 5 to 10 seconds at low speed | 3 minutes total |
| Gentle movement | Easy stretching or range-of-motion work for treated muscles | 5 minutes |
Massage Gun Safety and Precautions
Percussion massage is generally safe for healthy adults, but it is not for everyone. Be cautious if you have:
- Blood clots or a history of them
- Recent surgery or a fracture in the area
- Open wounds, bruises, or skin infections
- Osteoporosis or other bone conditions
- Pregnancy, especially on the abdomen or lower back
Always check with a doctor if you are unsure. Also avoid using the device on your neck, the front of your throat, or directly over the spine.
Watch out: Pressing hard does not speed up recovery. Excess pressure can bruise tissue and cause soreness that lasts longer than the workout itself.
Building Your Recovery Routine: Your Next Steps
Start small. Add a five-minute percussion session after two or three workouts each week, then build from there. Track how your muscles feel the next morning so you can see what works for your body.
If you want to go deeper, the anchor words covers which recovery tools suit runners over 40, and the anchor words walks you through building a plan from scratch. Pair either one with a device from our lineup, such as the anchor words, to put these steps into practice. Shop the full recovery collection today.

Frequently Asked Questions
Do massage guns help with workout recovery?
A 2023 review reports that massage guns may improve short-term range of motion, flexibility and some recovery-related outcomes. The same summary does not establish a universal recovery percentage, and effects on strength and balance are less clear. Think of percussion massage as a useful add-on to sleep, nutrition and gradual training load, not a replacement for them. Results vary by person and by the activity being measured.
How soon after exercise should I use a massage gun?
Research has examined percussion massage after strenuous exercise, including a 2025 study that reported reduced delayed-onset muscle soreness ratings. The studies reviewed do not settle a single ideal time, so many people use the device within the first day after a hard session or during a cool-down. Start with short sessions and see how your muscles respond the next day before increasing time or intensity.
When should you not use a percussion massager?
Avoid using a massage gun directly on bruises, open wounds, recent fractures, areas with blood clots or inflamed joints, and over bony prominences or the front of the neck. Stop if you feel sharp pain, numbness or tingling. If you have a medical condition, are pregnant, or have a pacemaker, check with a healthcare provider before use. The University of Utah advises limiting use to two to three minutes on any one area.
How long should you use a massage gun on each muscle?
The University of Utah advises limiting use to two to three minutes on any one muscle group or area. A 2025 study found that two 40-minute sessions produced greater soreness-recovery benefits than two 25-minute sessions, but that protocol was a research setting and is not a general home recommendation. Let the device do the work rather than pressing hard, and move steadily across the muscle.
